Canning Lemon Juice
Years ago, I purchased a case of lemons from Bountiful Baskets. After squeezing all the lemons, I froze them in ice cube trays. We used those lemon cubes all year to make fresh lemonade. It was amazing!
On a whim,… Continue reading
Single-Serve Chocolate Avocado Mousse
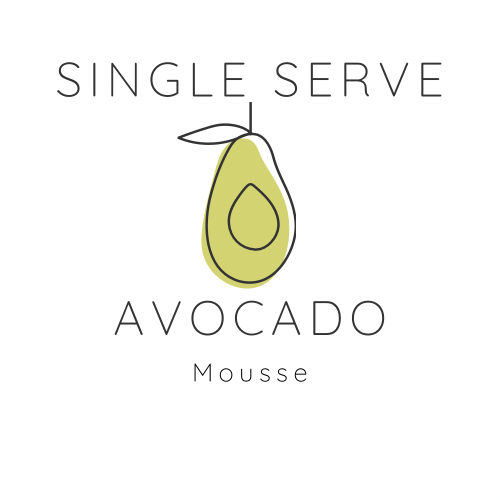
Several years ago, a friend of mine brought a delicious dessert to a gathering. After we’d tasted it, she told us the ingredients–and avocado was the star!
Not only is this dessert delicious, but it’s great for you, too.
Recently,… Continue reading
IKEA Holmsund Cover Hack

A few years ago, we bought a Holmsund sectional sleeper sofa from IKEA. It’s been a great functional couch for our family, and I love the blue color we chose. However, despite being washable, the cover seemed to attract stains.… Continue reading
Roasted Pumpkin & Pumpkin Pie from Scratch!

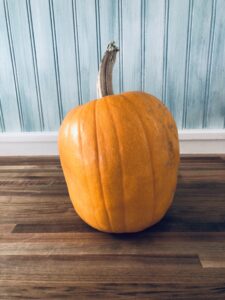
I can’t believe it’s taken me almost a full year to post about our pumpkins! Last year, we were pleasantly surprised to find sugar pumpkins growing in our back pasture. We harvested three, and I was able to use two… Continue reading
Sewing Machine Mats & Covers!
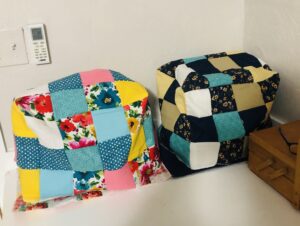
Somehow I had some extra time on my hands this weekend–enough time to do a little sewing!
My hubby built me an amazing space for sewing and crafting, but I noticed that my machines stick to the painted surface. So… Continue reading
 Find Me


 Find Me