My latest creation…
Megan’s two best friends had their 11th birthday last week, and Megan, of course, wanted to do something extra special for them. She had purchased journals and “Smencils” for them already, but needed something special to pull it all together. All of the girls carry around their journals with them everywhere they go, so I thought, why not make a cute purse to hold their journals?
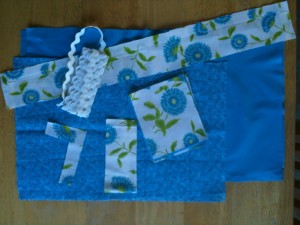
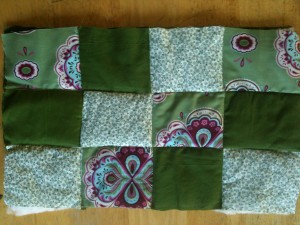
I don’t have a specific pattern (this is a “Karen” thing! lol), but the basic idea is to create a “purse” that opens up and holds a journal and pens/pencils or even a small Bible. I chose three colors of fabric–one plain, one with a basic pattern, and then one with a really vibrant pattern. I cut out two pieces of the plain fabric to be the backing–these are about 12 x 18. Then, I cut out two pieces of the basic pattern to be the pockets on the inside–these are about 8 x 11. I decided to quilt the front cover, so I used all three fabrics to cut out 12 smaller blocks (4 of each fabric)–probably about 4 x 5. The long, skinny pieces are the handles–you’ll need two strips about 20 inches long and 3-4 inches wide. There’s also a smaller piece, about 10×2 that I used for a velcro closure to keep the purse closed. The L was just for fun–a little monogram that I outlined with the white rickrack.

So, I first sewed the squares together to create a quilted look for the outside of the purse. I layered the quilted back with a thin layer of batting and sewed the quilted part to one of the plain pieces. (I sewed different color bags for each of the girls, so the pictures are mixed.) As you can see, I did not cut my squares on the first bag perfectly even, but it still turned out cute!

I sewed velcro to one end of the outside (quilted side) and then made the closure and sewed the matching velcro strip to the end of that & sewed that onto the opposite side (in the picture above, the velcro would be sewn onto one of the center solid green squares and the closure onto the other center green square).
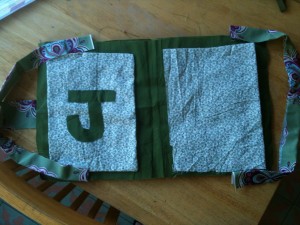
Now for the inside! I folded the two pockets in half (with fronts facing) and sewed together, leaving enough room to turn them inside out & then sewed them shut. On the pencil pocket, I centered the letter & sewed on, then sewed the rick rack on around the edges. Then, I sewed the handles together (right sides facing) and turned them inside out. this is the basic layout of the pockets (this was taken before I ironed everything and sewed the pockets together):

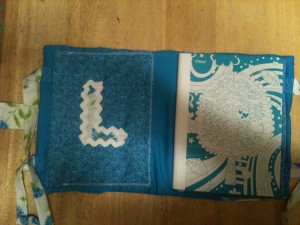
I sewed the pockets to the lining on three sides, leaving the left sides open. A journal will slide nicely into the pocket on the right, and I used velcro to provide a closure for the pocket on the left to hold pencils, etc.
Once the two sides are completed, I put them together, right sides facing. The handles you line up with the ends matching the outside edge of the bag, about 3 inches in from the edge on each side. The handles will be inside of the bag as you are sewing the outside and inside together. I also pinned the closure to the inside to avoid accidentally sewing it. Sew all around the edges (I went twice around to make sure the seams were solid), leaving room to turn it inside out. Turn inside out and finish sewing together. That’s it! Here’s the finished inside:

Some of you are probably noticing the crooked seams (just cut everything perfectly & you’ll avoid that!), but these turned out really cute and were a hit. And they probably only took an hour or two to make. Fun project for Christmas!


